Sunday, June 29, 2008

Blancmange and blueberries


BLANCMANGE (pronounced bluhmaange)
This is my entry for CLICK: Yellow for Bri hosted by
Jugalbandi.

According to the American Heritage Dictionary: old Middle English had the word blankmanger: a dish made with almond milk, and from Old French blanc mangier : blanc, white + mangier, to eat.

In simple words it is a custard made with cornstarch, milk and sugar.
The end result is no longer white, thanks to the advent of food coloring.
Blancmange was a dessert that graced the Sunday table in my mother's house, set in an aluminum rabbit mold. When unmolded, my mother would decorate it with fresh cream that she got from boiling the morning milk. The light dessert was the perfect end to her rich Sunday lunch.
What I'm doing here is recording an old recipe...I know the younger generation in the kitchen prefer the shortcut of instant puddings, but there are some who are curious about, "How were things done back then?" This is for them.
Also, no matter what, the childhood taste and memory of blancmange is revived by this recipe...so much love attached to those memories.
This dessert is the mother of all the instant puddings on the market these days.
Growing up, we used the British Brown and Polson's flavored cornflour, that came in packets of 5 different colors and flavors to a box, so do experiment with those. Now in lieu of the B&P packets, later replaced by Weikfield's, I use cornstarch and follow this recipe:

2 cups non-fat milk, 2 rounded dessert spoons cornstarch, 2 level dessert spoons sugar (I use Splenda), and 1 tsp vanilla. Food coloring.
Add 1/2 to 1 Tbsp more sugar if you have a sweet tooth.

In a saucepan bring 1 1/2 cups milk to a boil.
In half a cup cold milk mix cornstarch till smooth. (If using Splenda increase cornstarch by 1/3 dessert spoon)
Add food coloring of choice.
Pour mix into boiling milk stirring constantly for 2 minutes till milk thickens to custard consistency.
Remove from stove top and add vanilla.
Mix and pour into mold. Refrigerate, but it also sets without refrigeration.
I used a small mold today, as I made this only for two people and HD (Hubby Dearest) does not like desserts. (More for me, I say)

Unmold and decorate with fresh cream made at home by boiling milk, Crema Fresca, or fruit, or eat as is. I used blueberries as that's what was on hand.
A perfect diabetic dessert, and also great for children/anyone who dislikes drinking milk. It is a fat-free dessert too as I ignore some manufacturer's instructions to add a Tbsp of margarine to the pudding.
Now, Brown and Polson's custard powder is available in some US grocery stores in a tin.
Do not use Splenda if serving this to children or expectant mothers.

Friday, June 27, 2008

5 star Idlis, July 2008

This recipe is for the Beginner and Intermediate Indian cook.


Posted by Picasa


The idli is a perfect food for everybody: from active adults and children to seniors on a light diet. A protein, because of the urad dal and rice combo, it has no fat...unless you drown it in ghee, of course. It is a very popular breakfast dish in South India and usually accompanied with chutney and sambar. Some serve it with palya/potatoes too, and others with kurma (a mix of vegetables cooked in a sauce).
Breakfast for dinner.We eat idlis for dinner here in the States, as HD (Hubby Dearest) and I have bagels/toast for breakfast, with pancakes on Sunday. Lunch for him is fruits and nuts and for me it is whatever I can find in the fridge. This leaves me the mornings free for my morning walk and working on my laptop. Exercise is of paramount importance for a diabetic...and everybody else. I start making dinner around four and we eat it at five and then have a snack before bedtime.
Since the kids left home, dinner is always Indian food. The older we get, the more we want Indian food and without planning and determination it is getting harder to make it. So, I have a food bank in my freezer for days I cannot/don't want to cook.
The Food Bank is stocked with heat and serve dishes. I cook double at every meal, immediately cool the food I'm freezing and then put it away. Don't let food you're freezing for another meal sit out all day long and then freeze it.
For my food bank
For idlis I pick a week when I am feeling well and then make a large batch, cool immediately and freeze. Nowadays I freeze four idlis and a sandwich bag of chutney...instant dinner for HD on nights I am too tired or too full to cook.
Idlis freeze perfectly and re-heat excellently when steamed over a pan of water or in the microwave. I prefer the steaming method for re-heating, as it is as good as fresh but don't over steam them, or your idlis will fall apart. I freeze larger batches if I can, when Indian guests are arriving, so at least once they can have a breakfast of hot idlis, and hopefully be impressed.
Before they arrive I also make 2-3 different chutneys and freeze them (remember the legs that can't stand for too long now?), so all this helps me to give them good, food when they are here. In my younger days I have made 400 idlis and frozen them for parties, so guests could start with idli sambar! They used to enjoy them and drowned in a bowl of sambar no one realized my idlis weren't as soft as they could be.
Anyway HD's family always made the best idlis: huge, fluffy, melt-in-your-mouth kind, and though idlis are not my favorite food, I decided I was going to try and find the best recipe. My Idli Diary goes back to 1984 and shows persistence and comments on a lot of idlis I have eaten in other people's homes and made in my own. Going through a lot of recipes online in May and June, I finally had to decide the one I've concocted by putting two recipes together and used for the last five years, was the winner in the end. Here it is:

1 c urad (using rice cooker cup)
2 3/4 c. ponni rice)
½ cup cooked Jasmine rice or any other regular rice, but not Basmati.
½ tsp Arm & Hammer baking soda.
Salt to taste.

Soak urad dal and rice separately for 6 hours or overnight.
Grind urad first, with one cup water.
I want it really soft and fluffy so I use my electric stone grinder for this, though for 25 years I’ve done it in a blender.
To save time, I grind rice (slightly coarse) in a blender wit half a cup water, while the other grinder is doing the urad.
Remove rice mixture and grind cooked rice and baking soda in blender with a little water, till fine.
Mix 20 strokes after mixing urad, rice and cooked rice mixture to incorporate air in mixture.
Let it ferment in a warm place.
Just before steaming, add salt and ¾ Tbsp Clabber Girl baking powder and mix well.
Pour into greased cups of idli stand and steam for 10 mins.

NOTES

I make idlis on a hot day for ease of fermentation.
I discovered Ponni rice in 2006. Since then my idlis have achieved five star status.
Ponni rice is a short fat rice, ideal for idlis...and I had never heard of it or seen it before 2006...that's the fun of cooking research...you discover something new all the time.
If Ponni rice is not available use par boiled rice. If your blender can't handle par boiled rice, or you can't get it, use any rice except Basmati.
Most people in a hurry just use idli rawa (sold in Indian grocery stores) and urad and are happy with the results.

TIPS

Idli batter has to ferment well for best results. (Seema Bhat of Recipe Junction suggested a pinch of yeast in cold weather...I have to try that).
Overfermented batter will get a yellow top and have to be thrown out.
Grease idli stand with non-stick spray using a little squirt and spread oil around the cup with fingers, paying attention to rim of each cup where idlis stick…can be done with cooking oil too.
Too much spray will result in yellow idlis.
Put idli stand into boiling water for better results.
I use a ten quart pot to steam my idlis in..
Water must be below the lowest idli plate, not touching it, or that plate will have ‘drowned idlis’.
Do not open lid for ten minutes.
Dip a finger in water and touch surface of top idli…if nothing sticks to it, it’s done.
Turn off stove, close pot and leave for another two minutes.
Remove stand and let it cool for five minutes before removing idlis.
Use point of sharp knife to go around rim and then idlis come out clean.
Serve with coconut chutney (recipe on this site). Chutney powder with oil also makes a good accompaniment as does sambar, palya or kurma.

For diabetic me: 2 idlis are the right amount to eat. I control the amount by treating myself to the second idli spread with 1/2 tsp ghee and sprinkled with 1/4 tsp sugar or make smaller idlis (like the picture above) and eat three! The mind 'eats' too and has to be content/controlled for good health.

LEARN SOMETHING NEW: THE HISTORY OF IDLI

I love research and the latest direction this interest has taken is researching Indian Food. Imagine my delight to discover the great scientist KT Achaya's book: Indian Food, A Historical Companion. HD does not know it, but the book's a gift from him to me...like most of the 'gifts' he give me, he will know it's from him when he sees the bill...
Anway this is what Mr. Achaya says about the history of idlis: "While Dosai and Vadai have a hoary two-thousand-year history in Tamil country, Idli is a foreign import. The earliest reference to something of a precursor to Idli occurs in the Kannada writing of Sivakotyacharya in 920 AD, and in the subsequent Sanskrit Manasollasa (1130 AD). But the three elements of modern Idli making are missing in these references: use of rice grits along with urad dal, the long fermentation of the mix, and steaming the batter to fluffiness".

Indeed, the Chinese chronicler Xuang Zang (7th century AD) categorically stated that there were no steaming vessels in India. Achaya writes that the cooks who accompanied the Hindu Kings of Indonesia between 800-1200 AD, brought fermentation and steaming methods and their dish Kedli to South India (Thirai Kadal Odiyum Tinpandam Thedu!).

While writing this article two friends came to mind, whom I'd like to mention here: Savitri Nair, who's idlis and recipe impressed and inspired me as a young bride and Nacha Subbramaniam, who made the best idlis for me every week for months,when I was laid up after an accident in 1986..and shared her secret of adding cooked rice and Clabber Girl with me. My thanks to both of you.

Wednesday, June 25, 2008

5 star Dosa

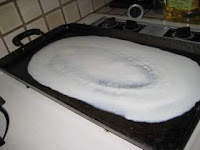
Pouring an oval large dosa: Pour two spoons of batter in a straight line and then shape into an oval. Pan must not be too hot. When done on both sides, smear red chutney inside, then place palya/potato in center.


This recipe is for the intermediate cook, familiar with Indian cooking.
DOSAS are thin crepes made with a fermented batter of rice and white lentils plus other ingredients. Pouring them is tricky so if you are a beginner pay attention to my notes, use a non-stick pan, a non-stick spray, and control the heat of your range.
Don't give up if the first dosa sticks, breaks up...the first dosa is considered a sacrifice, even for well experienced cooks.

May 2008 was Dosa recipe search month. Tired of eating my own average to good dosas for 30 years, I determined to find one GREAT dosa recipe.
Every other morning, the grinder would churn out different proportions of urad and rice and every night, the dosas would be poured with the comment pad next to the stove recording every move as I poured, ate, thought, ate some more. In my laptop I have a Dosa Diary that starts in June 2001 and has recorded all my experiments with dosa since.
Finally three weeks into this trial and error period, when HD (Hubby Dearest) started getting a glazed look in his eyes as he looked at yet another dosa on his dinner plate and faint rebellious murmurs of `high cholesterol' and `my heart' reached me over the sizzle of dosas on the pan, I found the perfect recipe.
It is from Seema Bhat's site Recipe Junction.
Kudos to you Seema for sharing this GREAT recipe.
Seema has posted it on her site as Paper Dosa with many other great recipes.

Here's Seema Bhat's (Recipe Junction)recipe, with my pictures, for those of you want to try it.
Read my notes for translation of Indian words and further explanations of how I got the best results.
On the health front, one of these dynamic dosas is plenty for diabetic me with a tablespoon of potato/palya, a little chutney and plenty of restraint. This dish did not raise my blood sugar. Remember, our traditional Indian combinations of rice and dal are a high protein with very little fat but too much potato is adding to the carbs.

SEEMA BHAT'S DOSA RECIPE (From Recipe Junction...with her notes.)

INGREDIENTS:
1 Cup Rice.
1/2 cup Urad Dal
1/2 cup Rice Powder
2 tsp Methi seeds
2 Tbsp Besan Powder
Salt as per taste

METHOD:
• Wash and soak rice, dal and methi seeds for about 4 hours in warm water (I soaked overnight in cold water)
• Grind all together into a smooth and thick batter along with salt, rice and besan powder.
• Set it in a warm place for 8 to 12 hours and let it ferment nicely.
• Heat up the griddle. Pour enough batter and spread it around in a quick clockwise motion from the center going outwards. Tip: keep the flame on low when pouring the batter and once you roll it immediately turn the flame on high to let it roast well.
• Pour some Ghee/Oil and allow it to cook on high heat until nicely roasted on one side.
• Serve hot with chutney of your choice.
• Tip: addition of besan powder here gives a nice orange/brown color to the dosa when roasted well

Geeta Aunty's added notes:

Shortcuts:
As my legs ache when I stand for a long time I only make dosas for the two of us now. As HD gets tired of washing up, I minimize that work by soaking the dosa and urad in the blender jar with methi seeds. I divide Seema's recipe by half.
I substituted par boiled rice for regular rice as I prefer the flavor of par boiled rice.
Urad Dal is a white split lentil, available at an Indian Grocer's.
Rice powder is rice flour also available at an Indian Grocer's.
Methi seeds are whole fenugreek seeds..I used half a tsp only as I was afraid the batter would get bitter.
Besan Atta is chick pea flour, available at the Indian Grocer's; the package is marked Besan and the flour is yellow in color.
After blending the mixture, I let it ferment in the blender jar in a warm place.
While pouring I spray the skillet with a non-stick spray and then sprinkle a few drops of water on the skillet each time I pour a dosa. (I hold my hand cupped under the water tap, get a little water in it and then sprinkle it on the pan. This trick I learned watching the cook at Woody's on Commercial Street, Bangalore, pour their wonderful dosas.
As my mother always told me, pour on medium heat and then raise the heat. (Raise it to medium high not high as I get better results that way). My mother cut the top off an onion and used either that or half a potato to create a non-stick surface. She would dip it in a little oil and the smear the dosa pan with it.
Seema's recipe is perfect for masala dosas too as my pictures will show you. You can use a slightly thicker batter and remove the dosa earlier from the pan to get it a little softer, or as in my case, leave it a little longer to get it really crisp.
I use 1/2 tsp of olive oil around each dosa but less is fine. The dosa does not absorb the oil poured around it on a non-stick pan.
I cannot resist putting a thin sliver of butter on each dosa to eat at the end with a little sugar in memory of the ghee and sugar we would eat with our dosas as children.
One last mouthful of this makes a great dessert bite to end the meal with.
Dosas have to be eaten hot, preferably right after they are made.
I make the long masala dosa so I only have to make one each for HD and me, on a non-stick 18 by 10 skillet used over two burners of my gas range.

For masala dosa, I smear the red chutney inside before I put the palya and tri-fold the dosa.

Red chutney: Grind 6 red chillies, three pods garlic, half an onion with salt and a little tamarind paste.
Smear inside of dosa with one tablespoon before adding palya/potato.

5 star palya/potato filling.

4 medium Idaho/brown potatoes.
1/2 chopped onion
1 sprig Curry leaves/karipata
1 Tbsp chopped coriander/kothimiri.
1 tsp Rai/mustard seed.
1 tsp whole jeera/cumin.
1-2 jalapeno or any other green chillies, chopped.
(If you do not want the palya to be too spicy, put the chillies in whole)
1/4 tsp haldi/turmeric.
1/2 tsp pav bhaji masala. (I use Everest Pav Bhaji).
1 tsp salt to taste
1/2 lime

Peel and chop potatoes into 1/2 inch cubes. Boil with haldi in just enough water to cover them.
When done, drain excess water.
Peel and chop onion. Fry in 1 tbsp oil. Remove from pan.
In same oil, season rai. When it splutters add jeera. When jeera gets light brown add karipata,kothimiri and green chillies. Fry for two minutes.
Add pav bhaji masala and fry for two minutes.
Add potato and salt and mix well...potato will get slightly mashed at this point.
Finally add fried onions and squeeze the juice of half a lime on potatoes. Mix and remove from stove.

OPTIONAL: Add grated garlic with green chillies.
Leftover palya makes great aloo bondas the next day or is great used with cheese for a grilled cheese and potato recipe.

From my mother's house with my own changes:
5 star chutney.
(In our younger days we would serve three chutneys with dosa...brown dal chutney, green coriander chutney and this white one. The white has turned light brown due to the tamarind paste we use here and it is the only one I make now.)


Ingredients

2 tsps oil
1 Tbsp rai/mustard seed.
1/2 Tbsp urad dal/split white lentil.
1/2 Tbsp jeera/whole cumin.
1/2 tsp methi seeds/whole fenugreek seeds.
One pinch hing/asafoetedia.
5-6 dried red chillies.
One tsp tamarind paste.
One green chilli.
1/2 cup grated coconut.
1/4 cup fried channa/pottu kadle
Salt to taste.
1 sprig curry leaves/karipata

Heat oil in a frying pan. Put in rai and cover pan. When it splutters, add urad dal. When urad turns light brown add jeera, methi seeds, one pinch asafoetedia/hing,red chillies, and green chilli. (Quantity of the last two ingredients depends on your taste). Fry till jeera turns brown. Be careful as jeera scorches quickly. Remove half this mix and place in blender with 5 of the 6 red chillies and the green chilly. Add karipata (curry leaves) to the mix in pan and fry for 1 min. Set aside.
Add grated coconut, pottu kadle/fried channa to mix in blender with tamarind and salt.
Blend till slightly coarse adding 1/4 cup water.
Taste and adjust salt, tamarind and chillies if necessary.
OPT: Garlic or a little ginger can be added to this chutney.
Pour into bowl. Add mix from frying pan on top.
Serve with idli or dosa.
Delicious eaten with hot rice and 1/2 tsp ghee too.

The really capable serve sambar with masala dosa too but for me the buck stops here.
My sambar recipe is good but not great, so I will put it up when I'm satisfied it has attained five star status.

Sunday, June 8, 2008

Payt Pooja: INDIAN COOKING ABROAD

google081482e7e75bd47a.html.

I don't know any country other than India where so much work, thought and effort goes into Payt Pooja. The variety of Indian dishes never runs out, with each state contributing it's own infinite choices. For those of you who don’t know what the words mean, Payt is stomach and Pooja is worship. When I was in school we would jokingly say: It is time for Payt Pooja, which meant ‘Time to Eat’.
Now we are all aware that what we put into our stomachs pays us back in health and quality of life...no one knows that better than me, now a diabetic balancing diet, exercise and rest every day to lead a healthy life. So Payt Pooja is not a joke any more…focus and serious attention to what goes into our stomachs, makes life good or otherwise.

Cooking has always been a great interest with me since I watched my mother in the kitchen, supervising the cook, or cooking herself. AS a child, like so many others,I rolled small chappattis for my dolls on a tiny rolling board and played 'cooking' with my small utensils. My interest grew when I started taking cooking as a subject at 14, in St. Mary's School, Pune, India. Under the watchful eye of Sister Rita Mary, I learned to bake, grill and cook English dishes,and study nutrition. The dishes I took home were praised by my father and loved by my younger brother. Their support raised my confidence level. At home my mother tried to get me to help the cook with breakfast so I could learn more. I started a cookbook in which I diligently wrote down my mother's recipes.

Cooking didn't become top priority with me till I got to the States, 30 years ago. I realized the only way we would have the wonderful food I had taken for granted as a child, young adult and pre-marriage, was if I made it. Once that shock wore off (and it was a shock, believe me), I found another in store for me: lack of Indian ingredients. I still haven't forgiven HD (Hubby Dearest) for the comment he made in India to my mother: "We get EVERYTHING in America". My darling mother believed him and I came out with nothing but a packet of her amazing sambar powder. Fortunately, for him and for me, HD knew enough to show me substitutes for ingredients, and I soon worked in some tricks of my own. I discovered my mother, an army wife, had passed on the trait of managing with what was on hand, to me. Once a year HD took me to Chicago and we loaded up on dals, beans, rice, flour, sooji, masalas, oil and everything else we might need for the next twelve months.
Now, luckily for us, we live in an area where we get 99% of all that is available in India.

The children have grown and flown, proof that I was cooking for them... not using them as guinea pigs (they thought that at one time). HD too is well, all things considered, though he's never lost the habit of looking at anything new I make with suspicion and saying, "What IS that?"

Diabetes now limits my ability to do a lot in the kitchen, but I still love trying out new dishes and improving old ones. Suddenly it seems very important to learn the BEST way of making the same old stuff. What I want to do on this site is, first: join this wonderful group of talented cooks from whom I'm learning so much, second: in an effort to give back and help others, test recipes from different online sites,cookbooks,shows etc. like I do now, and publish the best one, giving the author and originator of the recipe full credit, third: share my tried and true family recipes.
The best recipe will be the one with the most concise directions to understand and follow, and the one that produces the best results where taste is concerned...those overdeveloped taste buds we of Indian origin cultivate since early childhood, will settle for nothing less. I will also let you know if I change the recipe in any way. Besides all this, I will also mention here other blogs that catch my eye for set up, layout, design, content…there are some outstanding ones that deserve mention.
And I will keep on with my funny stories, so stop by for a visit often.

With good thoughts from me to you…happy cooking…

Geeta Aunty